
Happy Wednesday blogettes! You know, as an event planner, I am always amazed at the number of churches and venues that don’t allow real rose petals; which often means no rose petal toss and usually a bummed out bride. Thankfully, these easy to make ribbon wands can serve as the perfect substitute that are guaranteed to not only be a load of fun for wedding guests but for the bride and groom themselves. Try using ribbon or trim in your wedding colours for a more streamlined look or strips of fabric and lace for a more vintage, romantic look. And don’t worry, cute Siamese kitty is not needed for this project…

I first took advanatage of this clever craft when as a surprise to one of my couples this past August, I created more than 30 brightly hued ribbon wands for guests to wave once they exited the church. The delight on the bride’s face and the little squeal of happiness she let out was more than enough proof that ribbon wands are such a fabulous way to celebrate those first few moments of being a newly united Mr and Mrs. Here’s the rather obvious step by step instructions with the amazing photos captured by the one and only Jenna McKenzie on how to make your own wands. Happy Crafting everyone!

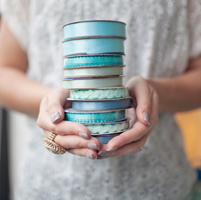
My snazzy blush pink ring is from Forever 21 in case you’re wondering! Nail polish is my fave gray “Master Plan” by Essie :)

{Step 1} Pick one of your rolls of ribbon, and unravel the entire thing. Match up both ends of the entire piece so that the ribbon is essentially folded in half. Then you’re going to fold the ribbon in half again, matching up both ends and the loop part where the ribbon is ‘folded’ in half. You will continue to fold your ribbon in half until the length of the folded pieces is your desired length (my pieces of ribbon are on average 26 inches in length; anything too long can easily get tangled). Once you have set your desired length, snip the loops at each of the folds so you are instead left with an even amount of ribbon pieces, all the exact same length (usually you can get 8 strips out of a roll).

{Step 2} Continue to unravel, measure and cut all of your rolls of ribbon until you have various piles of measured ribbon strips. Using your glue gun, dap a small amount of glue onto the end of a wood dowel. Place the very end of one strand of ribbon onto the glue dab and press down lightly to spread out the glue. Continue glueing various strands of ribbon onto the end of the dowel, overlapping the already glued on strands if needed. When you are ready to ‘seal’ the strands to the dowel, glue and tightly wrap a piece of ribbon around the dowel, starting at the very end of the dowel (where you have already fastened the ribbon strands to) working your way down until you have a neat and clean enclosure. Secure the end with more glue.

Et voila :) The prettiest ribbon wands I’ve ever seen!

This project is also being featured over on the amazing TWIPS blog today so be sure to check it out there! And if any reader is interested, I am looking to sell all of the ribbon wands I have. The blue ones were made just for the purpose of this project (and are worth $50.00) and the pink and orange ones are in amazing condition and around the same value ($50). I have 12 pinks and 7 blue; interested readers can just email me and we can work out a price and I can ship them off! For some photos of these ribbon wands in action check out Kelli and Brandon’s August wedding here! Enjoy your day everyone xo
P.S. I know this idea has been seen dozens of times and has circulated around the blogosphere for months, if not for well over a year, so I apologize for not knowing where the original inspiration/idea came from. Please let me know below if you have the answer as I believe in giving credit where it is due! Thanks.